How to Contour and Highlight Your Wedding Make-Up
Use our step by step guide to help you contour and highlight your wedding make-up like a professional
We have included third party products to help you navigate and enjoy life’s biggest moments. Purchases made through links on this page may earn us a commission.


Contouring has been a beauty secret of the stars for many years and now – thanks to celebrities like Kim Kardashian and Kylie Jenner – make-up contouring has gone mainstream.
Contouring can be a great way to slim your face and to highlight your features and when applied correctly it can transform your look, but when it’s done wrong you can end up with a makeup disaster.
If you are having a professional apply your wedding make-up for the big day then talk to them about whether contouring will be right for you and make sure you experiment with a few different looks during your trial.
If you are planning on some DIY wedding makeup then our handy guide with help from the experts will help you create the perfect bridal look – the key to getting it right is practise, practise, practise!
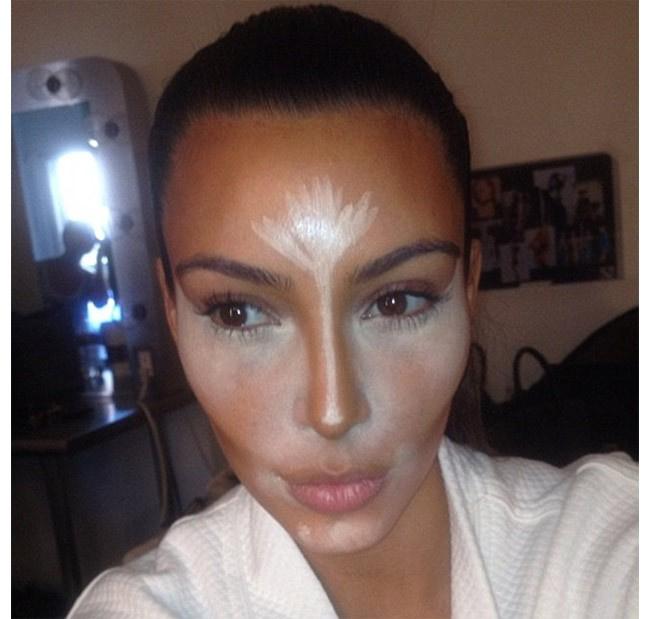
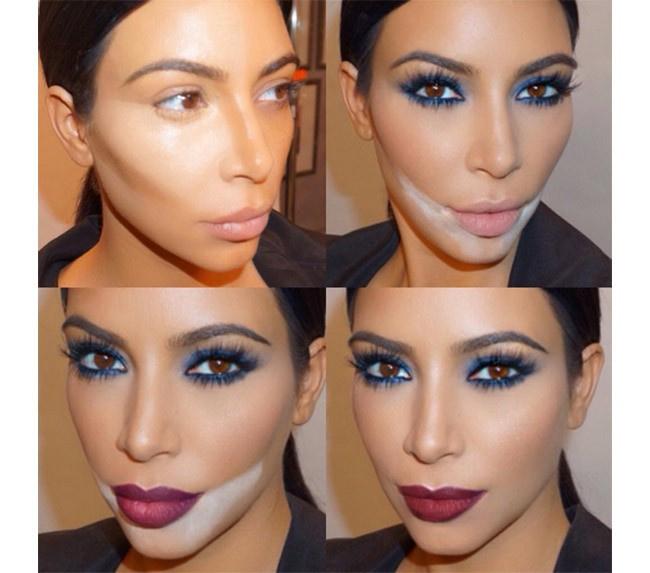
Image credit: instagram.com/kimkardashian
One of the best ways to learn how to contour your wedding makeup like a pro is to watch a tutorial video that will gives you step by step instruction. We love makeup artist Sharon Farrell‘s quick and simple guide to easy makeup contouring that is perfect for beginners:
7 Steps for Contouring Your Wedding Make-Up Perfectly
If you want to try makeup contouring yourself then we also spoke with Barrie Griffiths – Brand Ambassador & make-up artist for Nanshy as he talks us through his top tips for perfect make-up contouring:
1. Get an Even Base
It is essential that you prep your skin with your desired foundation before attempting to contour as this will even out your skin tone – a flawless base will set your makeup up for success.
2. Choose the Right Products
Both your contour and highlight can be either cream based or powder based, depending on your preference. These products need to be chosen wiselyand I would advise you you stick to either cream or powder, not a mix of both.
3. Getting the Right Shades
When choosing you product shades make sure that you go two shades lighter than your natural skin tone for the highlighter and two shades darker for the contour colour for the most natural look. The highlighter doesn’t have to be matte, you can also go for shimmer powder or cream to give more of a dewy finish.
4. Use the Right Tools
When working with cream based products, you can use both a damp beauty blender (my personal favourite) or blending brushes. For example Nanshy’s Marvel 4 in 1 Blending Sponge or Nanshy’s Perfectly Angled Contouring brush are both perfect for cream based products.
5. Know the Areas You Should Contour
Focus on your cheekbones and apply the majority of your chosen product from the centre of your ear, gently blending toward the hollow of your cheek. Then contour your forehead, around the hair line and down your jawline. Lastly the sides and tip of your nose, if needed.
6. Know the Areas You Should Highlight
Highlight to top of your cheekbones, the bridge of your nose, the centre of your forehead, your chin, the arch of your eyebrows and my little secret, your cupids bow.
7. Make Sure Your Make-Up is Completely Blended
My last tip and golden rule is, don’t worry about high-level coverage and make sure that your products are completely blended, it’s simply about creating a uniform base and giving yourself the most natural look, you want to avoid harsh line and caking.
Have you planned your bridal make-up yet? If not then don’t worry, we have an extensive list of hair and make-up artists from across the UK listed in our suppliers directory.

